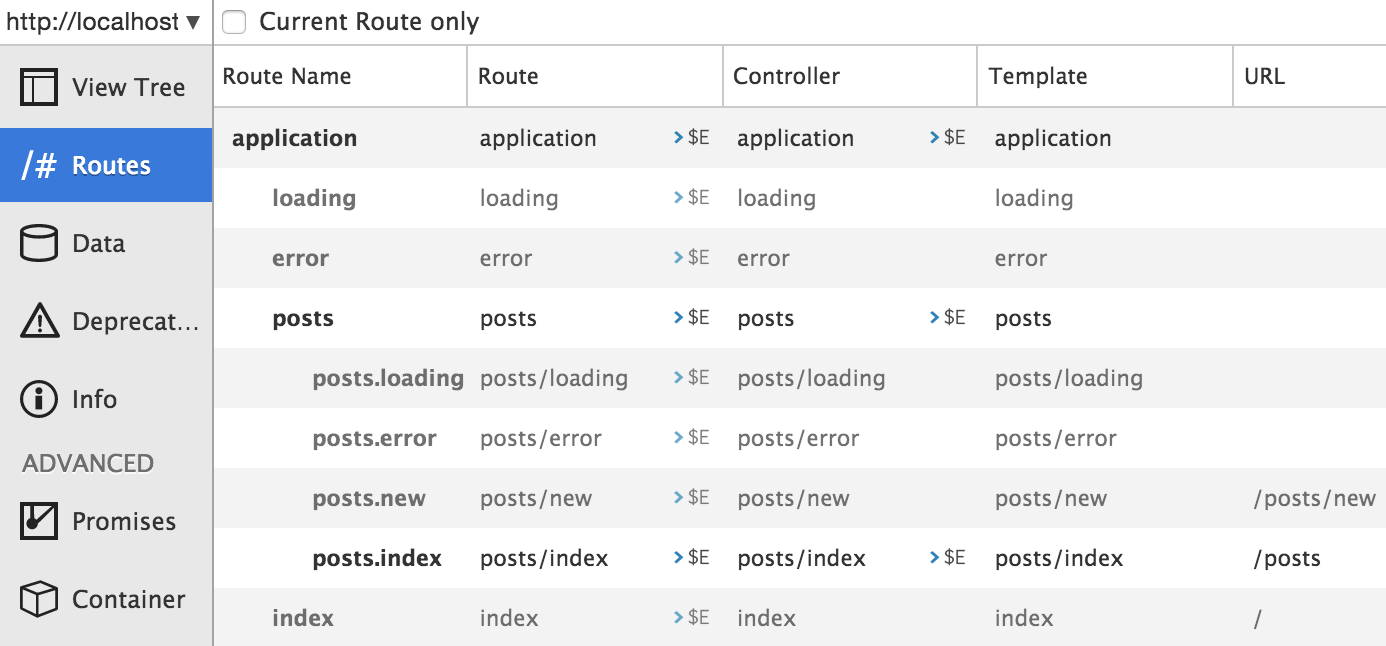
The inspector's Routes tab displays a list of all your application's routes. To view your routes, click on the "Routes" menu.
For the following code:
this.route('posts', function() {
  this.route('new');
});
The Route Tree will display these routes:

As you can see, it shows you the routes you defined, and the routes that are automatically generated for you by Ember.js.
We can use this list to figure out what Ember.js expects us to name
our objects. For example, if we want to create a controller for the
posts.new route, the Routes tab tells us that the controller
should be called posts/new. If we want a to add a loading route for the
posts resource, we can see that the route should be posts/loading.
It is also easy to see the generated URL for a specific route. In our
example, posts/index will have the url /posts.
As for objects that you have defined, you can click on them to send them to
the object inspector, or click on the $E button next to them to send them to the console.
Viewing the Current Route
The current route is highlighted in bold. However, as your routes grow in
number, it can be quite crowded, and harder to find the current route just by looking at the
font weight. A better way is to click on the Current Route Only
checkbox to hide all routes except the currently active ones.
