Let's think through what we want to do on the home page of our Super Rentals application.
We want our application to:
- List available rentals.
- Link to information about the company.
- Link to contact information.
- Filter the list of rentals by city.
We can represent these goals as Ember acceptance tests. Acceptance tests interact with our app like an actual person would, but can be automated, ensuring that our app doesn't break in the future.
We'll start by using Ember CLI to generate a new acceptance test:
ember g acceptance-test list-rentalsThe command will generate the following output, showing that it created a single file called list-rentals-test.
installing acceptance-test
  create tests/acceptance/list-rentals-test.js
Opening the new test file will reveal some boilerplate code that will try to go to the list-rentals route and verify that the route is loaded.
This boilerplate code is there to guide you into your first working acceptance test.
Since we are testing our index route, which is /, we'll replace occurrences of /list-rentals with /:
import { test } from 'qunit';
import moduleForAcceptance from 'super-rentals/tests/helpers/module-for-acceptance';

moduleForAcceptance('Acceptance | list-rentals');

test('visiting /list-rentals', function(assert) {
test('visiting /', function(assert) {
  visit('/list-rentals');
  visit('/');

  andThen(function() {
    assert.equal(currentURL(), '/list-rentals');
    assert.equal(currentURL(), '/');
  });
});
Now run your test suite with ember test --server from the command line in a new window and you'll see one successful acceptance test (along with a bunch of JSHint tests).
As mentioned before, this test boilerplate is just for checking the environment, so now let's replace this test with our list of goals.
import { test } from 'qunit';
import moduleForAcceptance from 'super-rentals/tests/helpers/module-for-acceptance';

moduleForAcceptance('Acceptance | homepage');

test('should list available rentals.', function (assert) {
});

test('should link to information about the company.', function (assert) {
});

test('should link to contact information.', function (assert) {
});

test('should filter the list of rentals by city.', function (assert) {
});
These tests will fail, since Ember tests will fail if we don't test for anything
(known as an assertion).
Since we have an idea of what we want our application to look like, we can also add some details to the tests.
Ember provides test helpers that we can use to perform common tasks in acceptance tests, such as visiting routes, filling in fields, clicking on elements, and waiting for pages to render.
To check that rentals are listed, we'll first visit the index route and check that the results show 3 listings:
test('should list available rentals.', function (assert) {
  visit('/');
  andThen(function () {
    assert.equal(this.$('.listing').length, 3, "should see 3 listings");
  });
});
The test assumes that each rental element will have a class called listing.
The visit helper loads the route specified for the given URL.
The andThen helper waits for all previously called test helpers to complete before executing the function you provide it.
In this case, we need to wait for the page to load after visit, so that we can assert that the listings are displayed.
For the next two tests, we want to verify that clicking the about and contact page links successfully load the proper URLs.
We'll use the click helper to simulate a user clicking these links.
After the new screen loads, we just verify that the new URL matches our expectation using the currentUrl helper.
test('should link to information about the company.', function (assert) {
  visit('/');
  click('a:contains("About")');
  andThen(function () {
    assert.equal(currentURL(), '/about', "should navigate to about");
  });
});

test('should link to contact information', function (assert) {
  visit('/');
  click('a:contains("Contact")');
  andThen(function () {
    assert.equal(currentURL(), '/contact', "should navigate to contact");
  });
});
Note that we can call two asynchronous test helpers in a row without needing to use andThen or a promise.
This is because each asynchronous test helper is made to wait until other test helpers are complete.
Finally, we'll test that we can filter the list down according to a city search criteria.
We anticipate having an input field in a container with a class of list-filter.
We will fill out "Seattle" as the search criteria in that field and send a key up event to trigger our filtering action.
Since we control our data, we know that there is only one rental with a city of "Seattle", so we assert that the number of listings is one and that its location is "Seattle"
test('should filter the list of rentals by city.', function (assert) {
  visit('/');
  fillIn('.list-filter input', 'seattle');
  keyEvent('.list-filter input', 'keyup', 69);
  andThen(function () {
    assert.equal(this.$('.listing').length, 1, "should show 1 listing");
    assert.equal(this.$(".listing .location:contains('Seattle')").length, 1, "should contain 1 listing with location Seattle");
  });
});
Of course because we have not implemented this functionality yet, our tests will all fail. Your test output should now show all failed tests, which gives us a todo list for the rest of the tutorial.
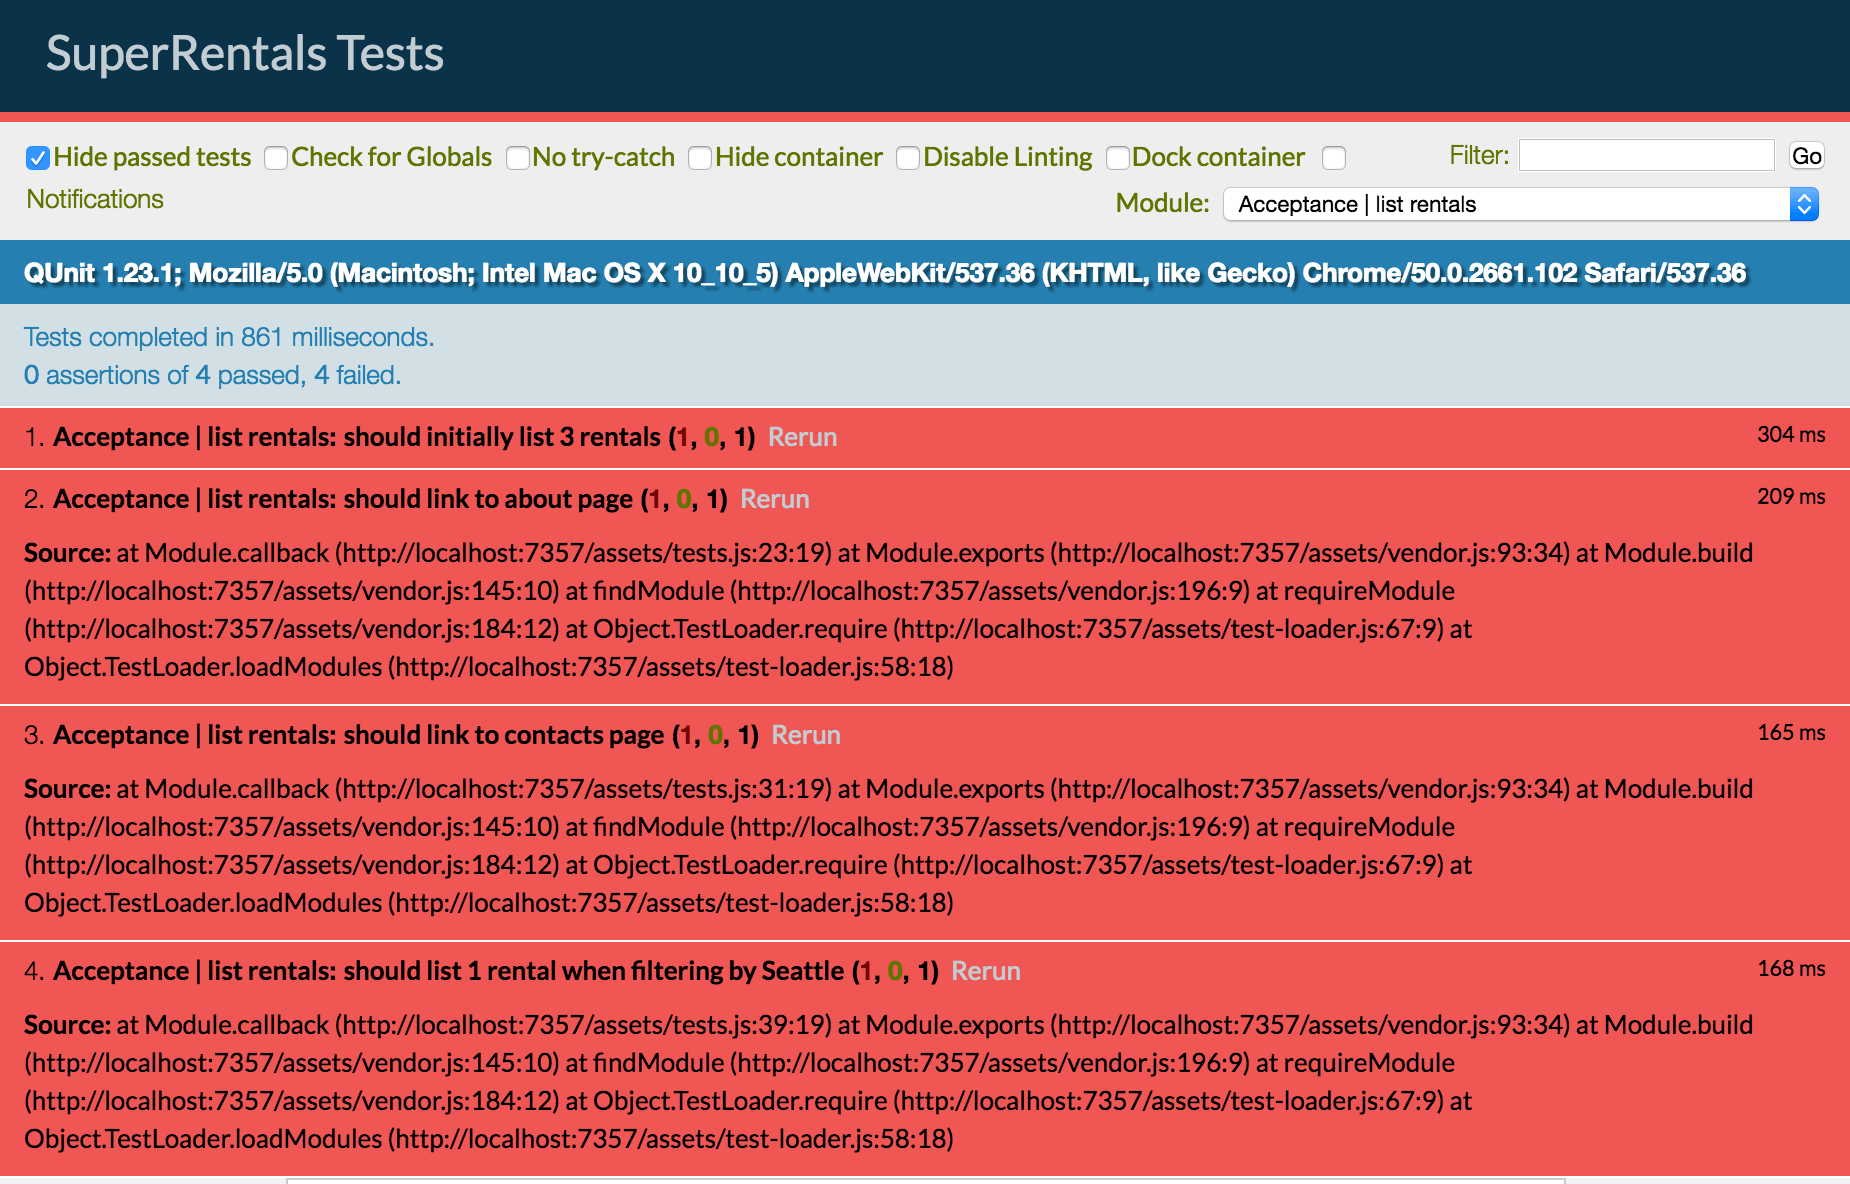
As we walk through the tutorial, we'll use our acceptance tests as a checklist of functionality. When all are green, we've accomplished our high level goals!