The inspector comes with its own object inspector that allows you to view and interact with your Ember objects. While using the inspector, click on any Ember object to open the object inspector and inspect its properties.
Viewing Objects
Here's what you see when you click on the posts controller.
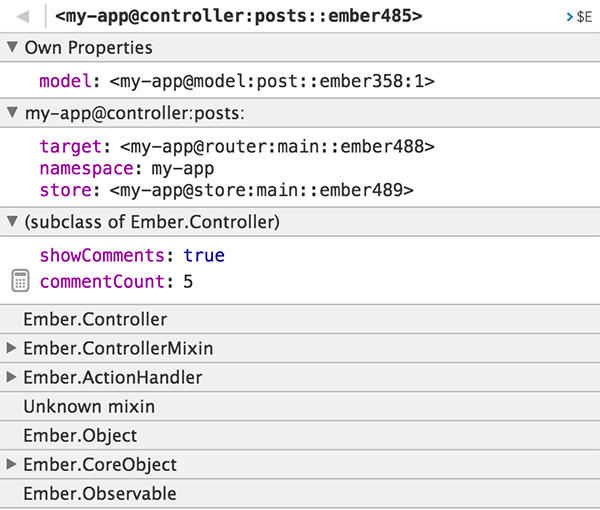
You will see a list of parent objects and mixins that make up the object. The properties are organized by which parent object or mixin they were inherited from.
Computed properties are preceded by a calculator icon. If a computed property hasn't been computed, you can click on the calculator to compute it.
All properties are bound to your app, so property updates in your app will be reflected live in the inspector.
Sending Objects from and to the Console
Object Inspector to the Console
You can send objects and properties to the console by clicking on the $E button.
This will set the value to the global $E variable.

When you hover over the object's properties, a $E button will appear
next to every property. Click on it to send the property's value to the
console.

Console to the Object Inspector
You can send Ember objects and arrays to the object inspector by using
EmberInspector.inspect.
var object = Ember.Object.create();
EmberInspector.inspect(object);
Make sure the Ember Inspector is active when you call this method.
Editing Properties
You can edit String, Number, and Boolean properties in the inspector.
Changes will be reflected immediately in your app. Templates bound to
these properties will auto-update.
Click on a property's value to start editing.

Date values will open a date picker while editing.
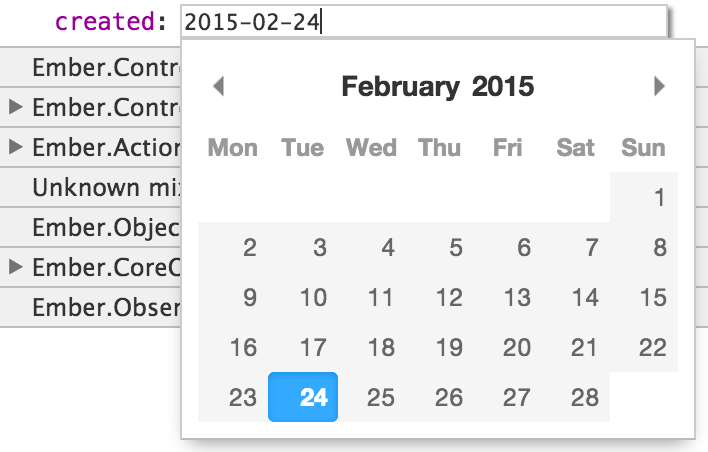
Edit the property and press the ENTER key to commit the change, or ESC to cancel.
Navigating the Object Inspector
Properties that are themselves Ember objects or arrays can be inspected too. Click on the property's value to inspect it.

You can keep
navigating through the inspector as long as properties are either an
Ember object or an array.
In the image below, we clicked on the model property first, then clicked
on the store property.
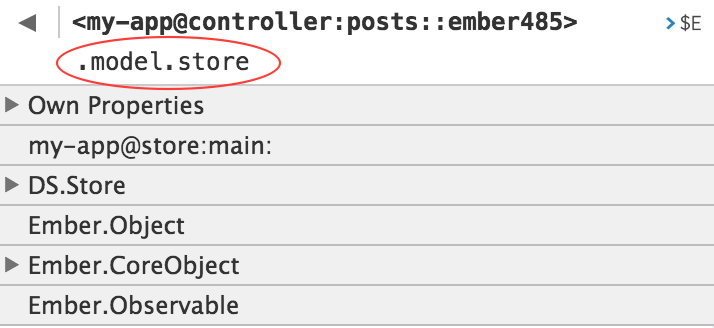
You can see the current path of the inspected object at the top of the inspector. You can go back to the previous object by clicking on the left-facing arrow at the top left.
Custom Property Grouping
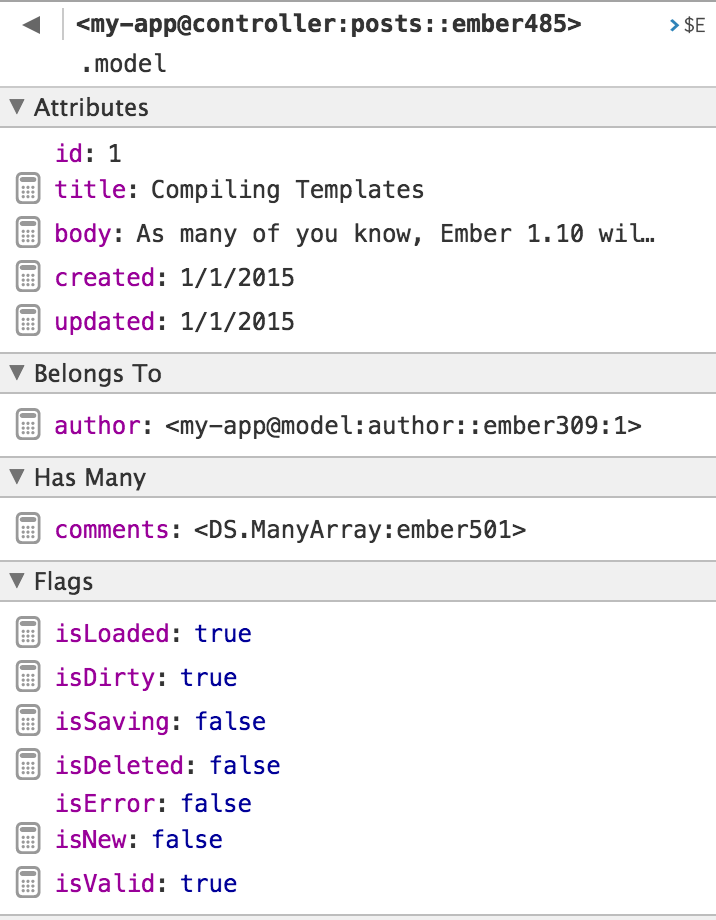
Some objects' properties are not only grouped by inheritance, but also
by framework level semantics. For example, if you inspect an Ember Data
model, you can see Attributes, Belongs To, Has Many, and Flags
groups.
You can customize how any object shows up in the object inspector, and
Ember Data models are just an example. If you are a library author, you
can define a _debugInfo method on your objects to customize how the inspector
displays your properties. For an example on how to customize an
object's properties, see Ember Data's
customization.